The fixture sits on the lower shelf of the utility table and is shimmed in position. The primary and secondary drive belts are from junked washing machines.
Updated September 30, 2019. Using 3/32" (.09375" or 2.381 mm) Harris 4043 aluminum wire to make the coil. A new drive, a new wire guide scheme, and a new wire transport are show here. The 6" conduit used for this test is a brand X scrap piece rescued from a junk pile.
Why Cantex ?
Why Cantex ?
Their material is UV-stabilized for weathering strength in the changing climate of Northern Ohio. It also machines and drills consistently. The dielectric constant is the same from piece to piece, and the Cantex compound resists chalking. I've filled a dumpster with look-alike parts that failed to survive the coiling process at some point.
See http://www.cantexinc.com for specifications.
The information presented here is accurate and true to the best of the author's knowledge. All recommendations and statements are made without guarantee on the part of the author. The author disclaims any liability in connection with the use of this information.
Tuesday, December 11, 2012
The fixture sits on the lower shelf of the utility table and is shimmed in position. The primary and secondary drive belts are from junked washing machines.
Next, we need a way to get wire to the turning tube. The base is again scrap plastic .707" Nylon. The floating casters, like everything else you see used in this project, are from a junk yard. The plastic carton is a seat for the operator, and is equipped with a cushion. The pedestal holding up the spool of wire is from a discarded MIG welder, as is the wire spool adapter support.
The torque supplied by the over-sized head stock is enough to pull the wire through the bender to the tube form.
Inches per Pound of Wire
WireDiameter
Silicon Stainless
Aluminum Bronze Copper Nickel Steel
.020 " 32,400 10,300 9800 9950 10950
.025 " 22,300 7100 6750 6820 7550
.030 " 14,420 4600 4360 4400 4880
.035 " 10,600 3380 3200 3240 3590
.040 " 8120 2580 2450 2480 2750
.045 " 3/64 " 6410 2040 1940 1960 2170
.062 " 1/16 " 3382 1070 1020 1030 1140
.078 " 5/64 " 2120 675 640 647 718
.093 " 3/32 " 1510 510 455 460 510
.125 " 1/8 " 825 263 249 252 279
.156 " 5/32 " 530 169 160 162 179
.178 " 3/16 " 377 120 114 115 127
.250 " 1/4 " 206 66 62 63 70
----------------------------------------------------------------------------------------------------------
Revised Headstock Design September 18, 2015
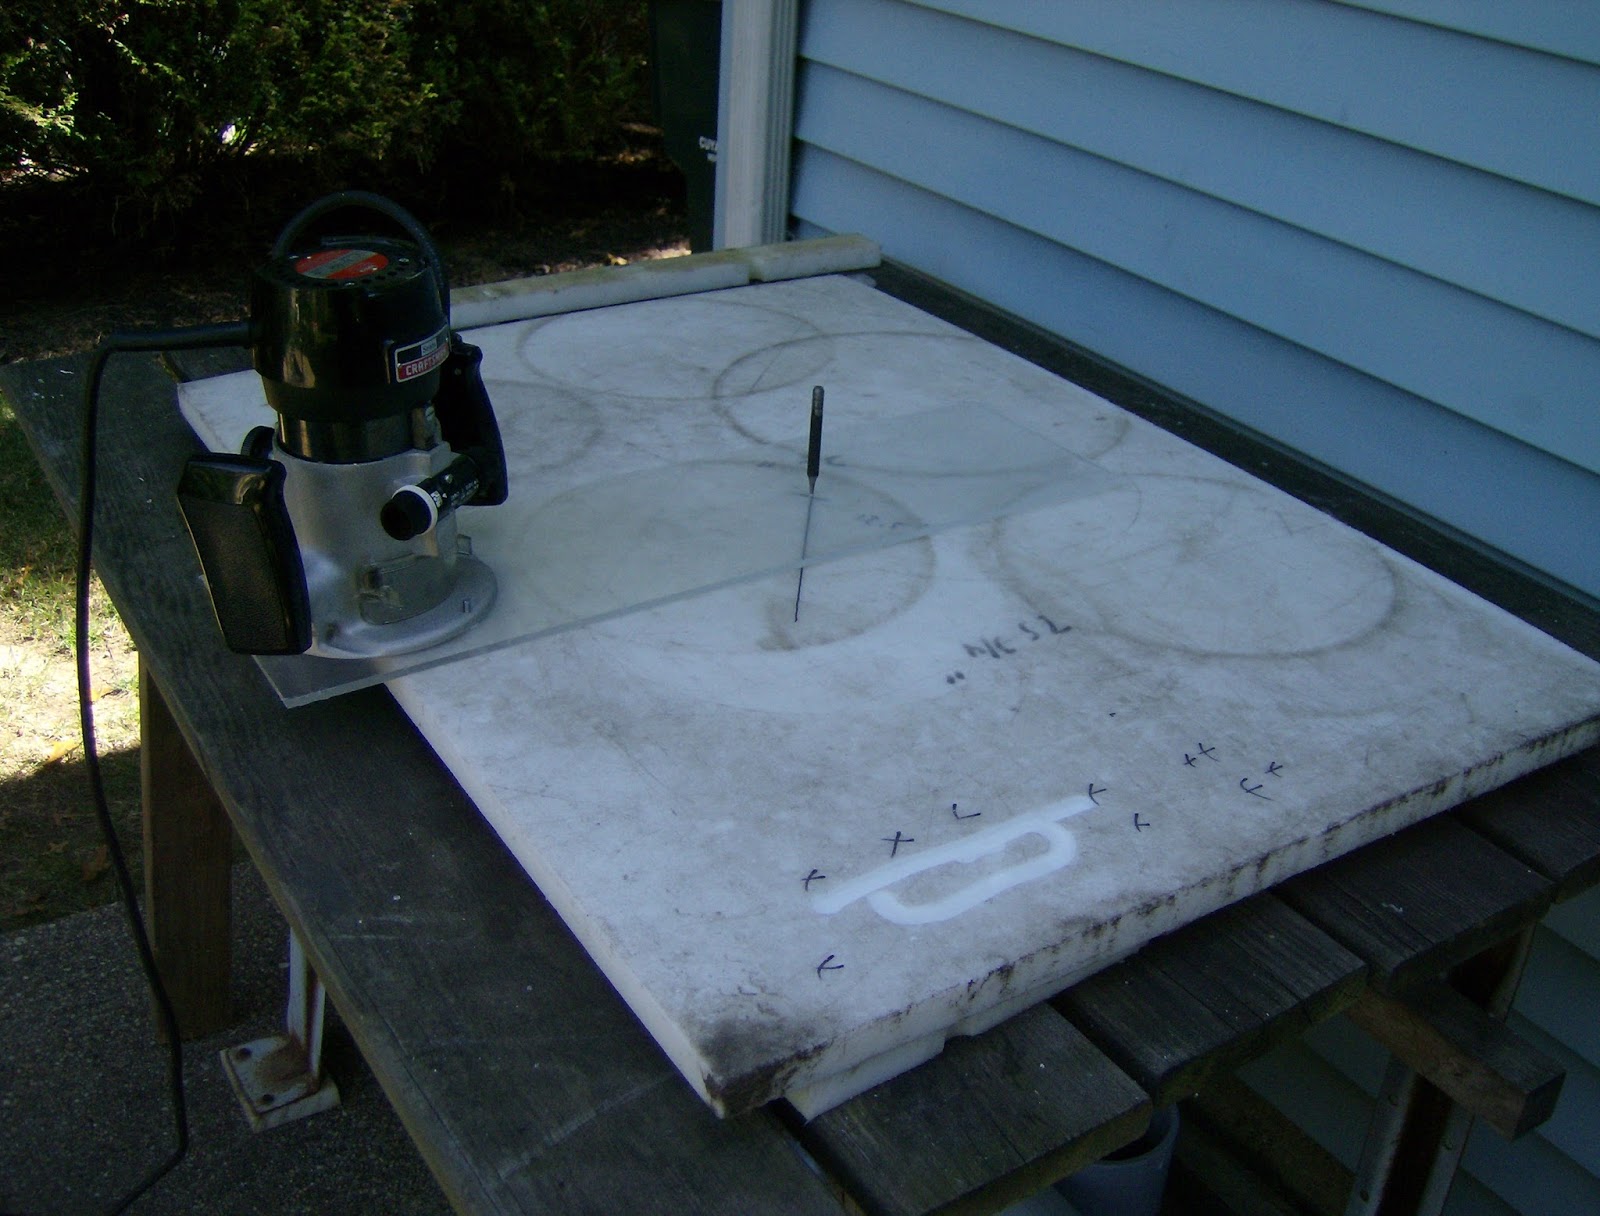
Cutting the new sheave from a large square. Six passes with router were needed to make a complete cut on
one inch material. Below, an acrylic panel fastened to the bottom of the router acts as a circular guide around the center pin.
The original 16 inch flange/sheave is shown resting on the new sheave material. Why the bigger pulley ?
Slower travel speed and increased torque for large diameter wires are pluses. .052", .062" (1/16) and 3/32" wires are more easily wound at slower speed. Operator control is the name of the game.
The head stock design will determine your surface winding speed and torque for wire forming.
The white plastic base is 1 inch thick HDPE sheet cut from a scrap square and bolted to a 4" schedule 80 flange. A router used for woodworking is indispensable for this work. Setup is simple. The machine does it's job flawlessly, but keep a supply of garbage bags on hand. You will empty your ShopVac reservoir several times as your work progresses.
Before final assembly with the mounting hardware, a router is used to create the groove for the drive belt. My thanks to redneckdiy.com for instructions on this method. The sheave is now ready for action.
The stub in the flange is schedule 80 stock. Standard PVC cement holds it in place. This is the interface between the fixture and the work piece.
The finished sheave has a inside diameter of 23 inches. Weight with hardware is 22.2 pounds.
Note the small grey bracket to the right of the flange. This supports my Digital Turns Counter; a pedometer compliments of the local health & wellness expo.
Saturday, November 24, 2012
Let's wind some coil !
Please note the use of loose-fitting gloves.
Exactly how large is large ? Here are the charts.
Here are links to schedule 40 and schedule 80 tube dimensional drawings,
from http://cantexinc.com.
http://www.cantexinc.com/images/drawings/DWGE00EA1E20.pdf
http://www.cantexinc.com/images/drawings/DWGE00EA1E21.pdf
A completed 10' section, made with 4" schedule 40 PVC electrical conduit. It's supporting 1100 feet of .045" stainless steel wire.
http://www.cantexinc.com/images/drawings/DWGE00EA2E30.pdf
http://www.cantexinc.com/images/drawings/DWGE00EA2E31.pdf
from http://cantexinc.com.
http://www.cantexinc.com/images/drawings/DWGE00EA1E20.pdf
http://www.cantexinc.com/images/drawings/DWGE00EA1E21.pdf
A completed 10' section, made with 4" schedule 40 PVC electrical conduit. It's supporting 1100 feet of .045" stainless steel wire.
http://www.cantexinc.com/images/drawings/DWGE00EA2E31.pdf
Subscribe to:
Posts (Atom)